Translating Subtitles
There are two ways to translate subtitles on Jubler. The first way is to manually translate the subtitles, and the second is to use machine translation.
Manual Translation of Subtitles
- In this section, you will learn how to:
- Create a blank file with original timestamps
- Split and join a subtitle file
- Match or synchronize timings of one subtitle file with another
Watch this video to learn how to manually translate your subtitles, or if you prefer to read the instructions, keep scrolling down.
Creating a Blank File
To manually translate subtitles, you need to first create a blank file, known as a child file in Jubler. A child file allows you to input your translated subtitles while keeping the same timestamps as the original file.
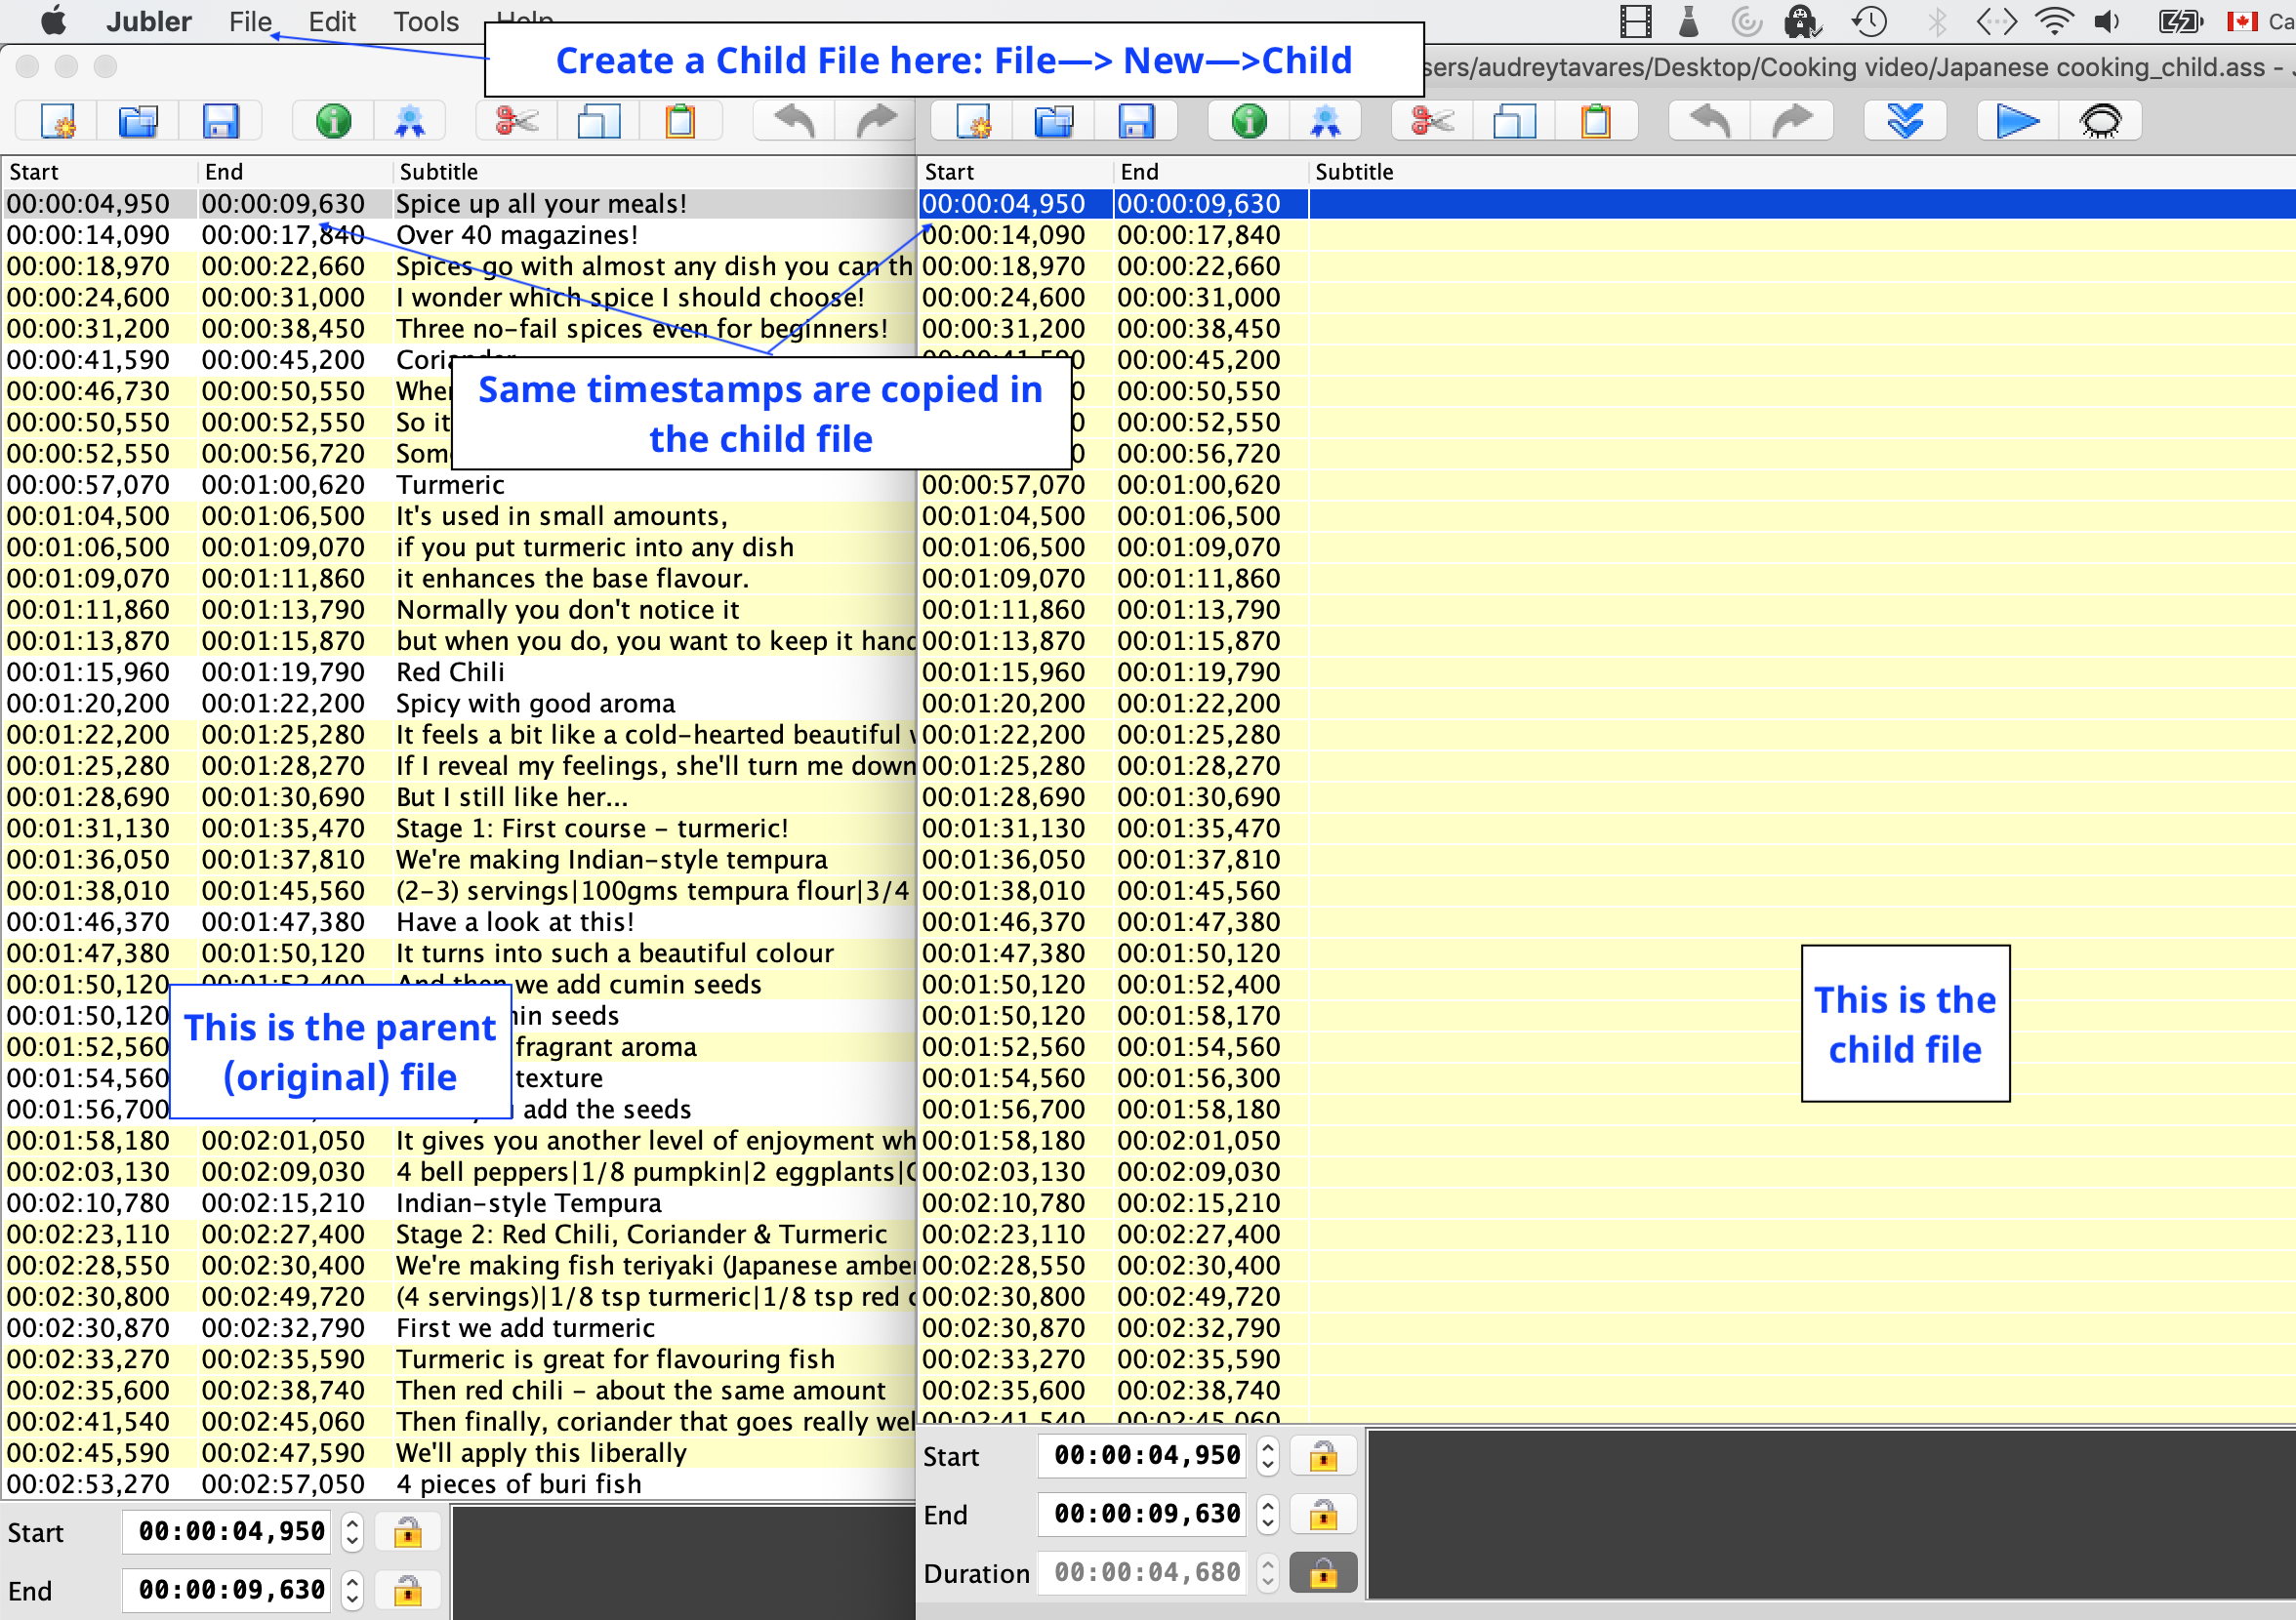
This is how your window should look after organizing the original and child file
- To create a child file, click the File tab at the top of the interface, then click New and then Child.
- To start translating, minimize and then move the window of your new child file so that both the original file and the child file are visible to you. This will allow you to translate your subtitles.
Splitting a Child File
If you ever decided that the file you wanted to translate was too large for one person, you can easily split the file. This way, you can send the different halves of the file to different people for translation.
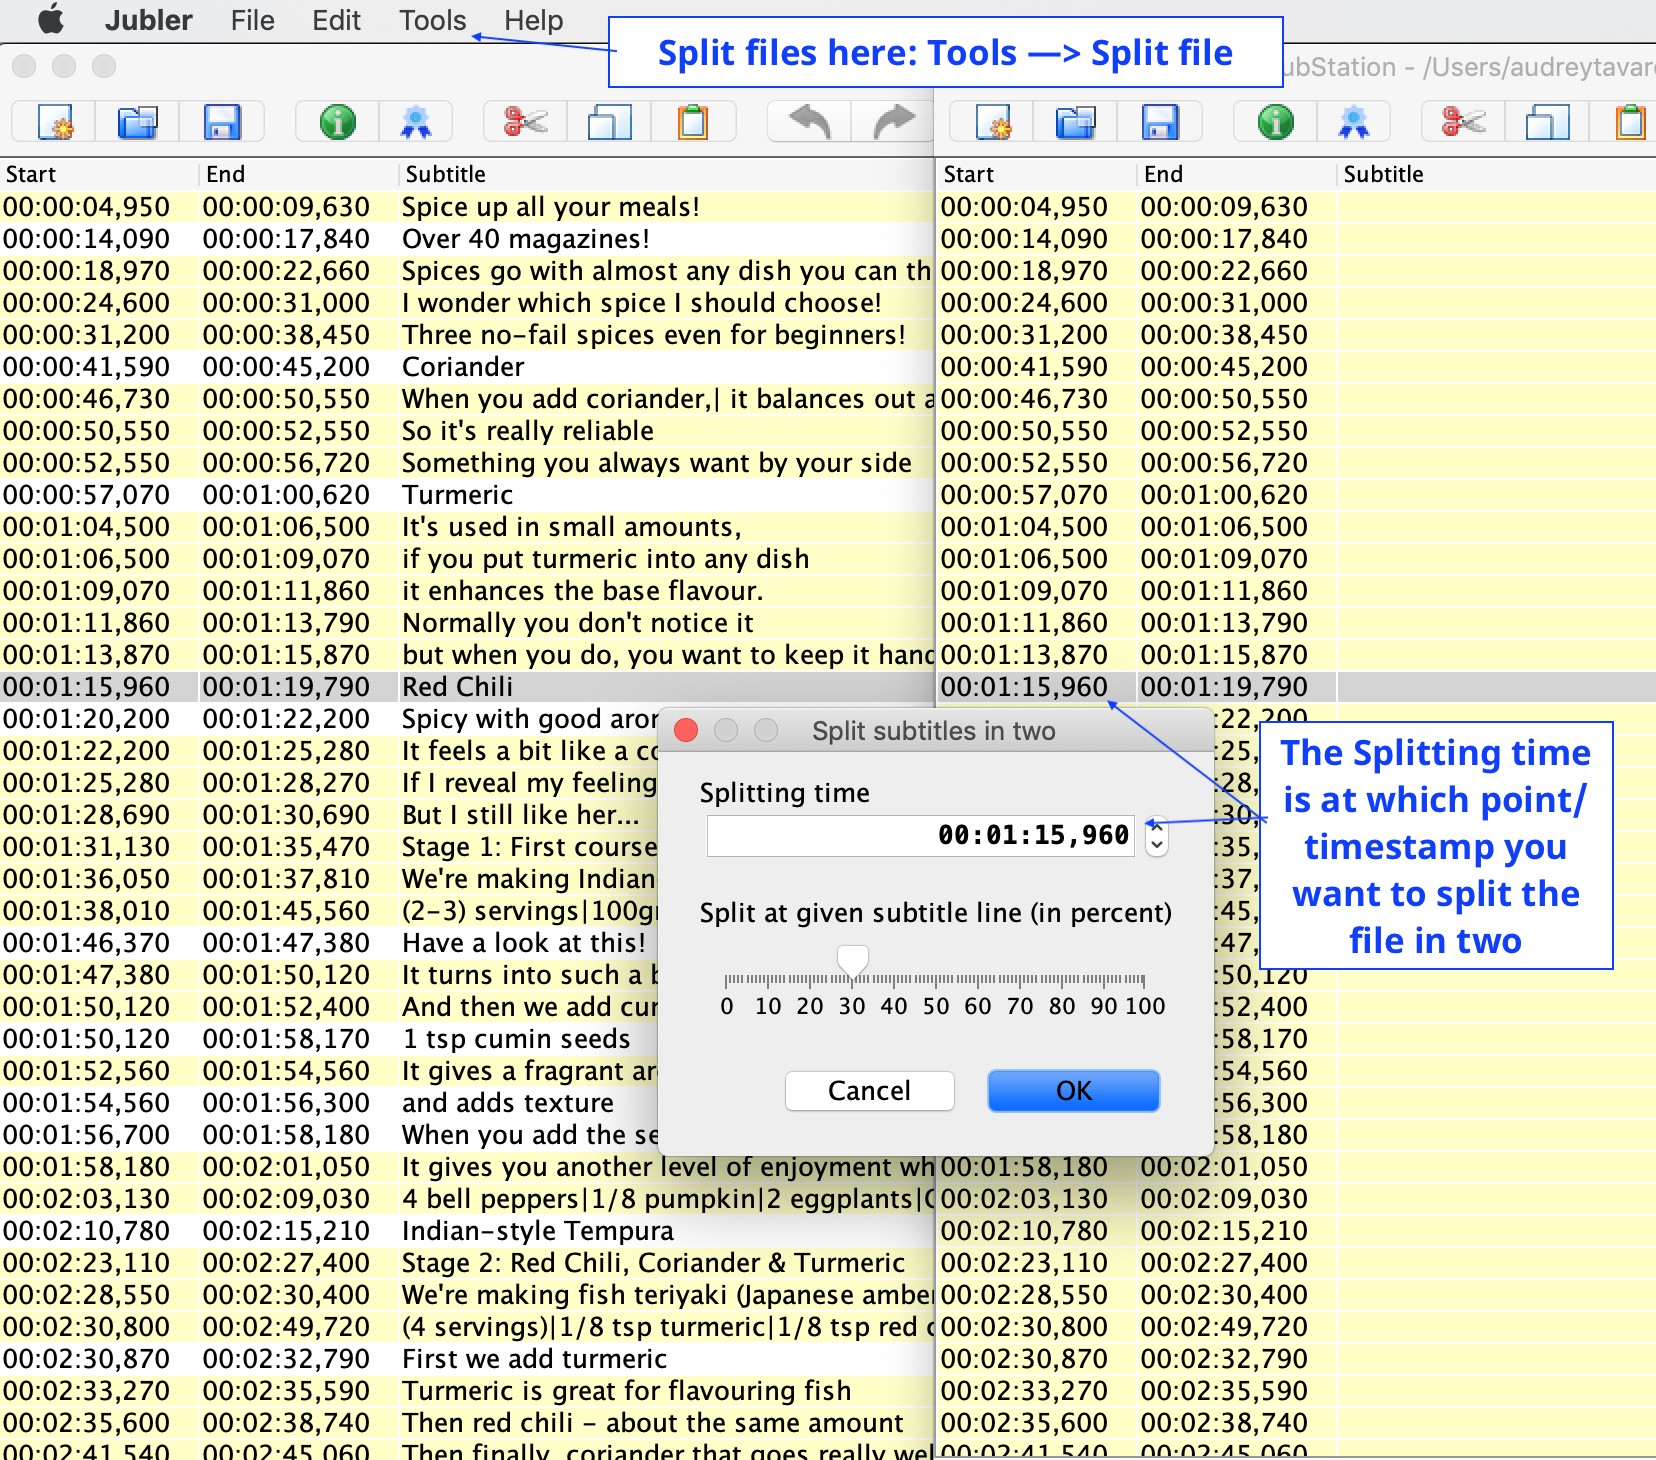
- To select at what point you’d like to split your file, select the subtitle line that will end the first file.
- To split the file, click the Tools menu at the top of the interface, and then click Split file.
- In the window that appears, ensure that the splitting time is correct, and press OK.
Caution
Jubler has now split the child file in two. However, on the second child file, the timestamps will now start at 00:00:00, which is not correct. Even though the start and end times have been changed on the second file, the same subtitle durations are maintained from the original file. This can be fixed when both of the child files have been translated. The two child files can be saved and sent to your translators.
Rejoining Translated Files
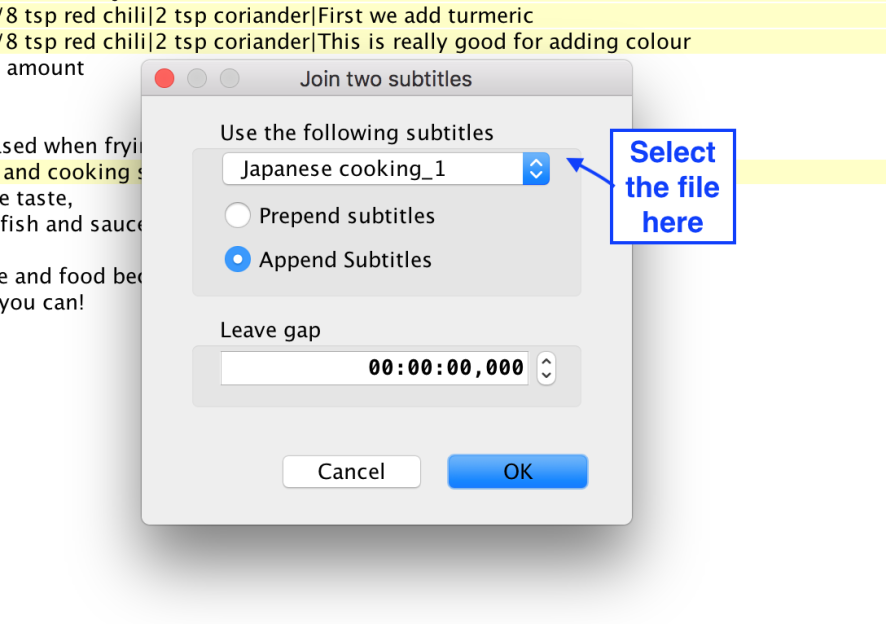
Once both child files have been translated, they can be rejoined and the time stamps can be corrected.
- To rejoin the translated files, select the first child file and click on the Tools menu, then Join Files.
- Select the file you want to join with (the second child file) and then click Append Subtitles to insert the subtitles after the ones in the current file.
- To confirm changes, press OK.
The two translated files are now joined.
Synchronizing the Timing of the Translated File
The final step is to synchronize all the timestamps of your translated file with the original file.
- You will first need to select all the subtitles in the translated file. To do this, with your translated file active, go to the Edit menu, Select and then All.
- To synchronize the timing of the translated file with that of the original file, go to the Tools menu and then click Synchronize.
- To specify which file you want to synchronize with, under Synchronize data from the following subtitles, choose the original file (with the correct timestamps).
- In the pop-up window, leave the Offset at 0. This will ensure that there are no timing differences between the subtitles of the original file and the translated one. Ensure that the Import Timestamp box is checked so that the timestamps will be carried over. Press OK.
All of the timestamps from the original file are now equal to that of the translated file. You can now import a video into your translated file and preview to ensure subtitles have been synchronized correctly.